 Skip to content

Tips for Cutting and Applying Sticky-Back Thermal Paper
Sticky-back thermal paper is versatile among other thermal labels. It produces clear prints, adheres securely, and is widely preferred across various sectors, including retail and logistics.
If you have ever struggled with misaligned labels or curls at the edges, then this article is for you. Let us explore the proper techniques for cutting and applying sticky-back thermal paper to achieve seamless and hassle-free outcomes.

Why Sticky-Back Thermal Paper?
Before we dive into the how, let’s quickly talk about the why.
Sticky-back thermal paper is a type of thermal paper with an adhesive backing. It’s commonly used in:
-
Shipping labels
-
Barcode stickers
-
Retail pricing tags
-
Warehouse inventory labels
-
Event tickets or wristbands
What You will Need
Cutting and applying sticky-back thermal paper is simple when you’ve got the right tools:
-
A sharp pair of scissors or precision cutter
-
A flat, clean work surface
-
A squeegee or ruler (to smooth it out)
-
A thermal printer that supports adhesive-backed rolls
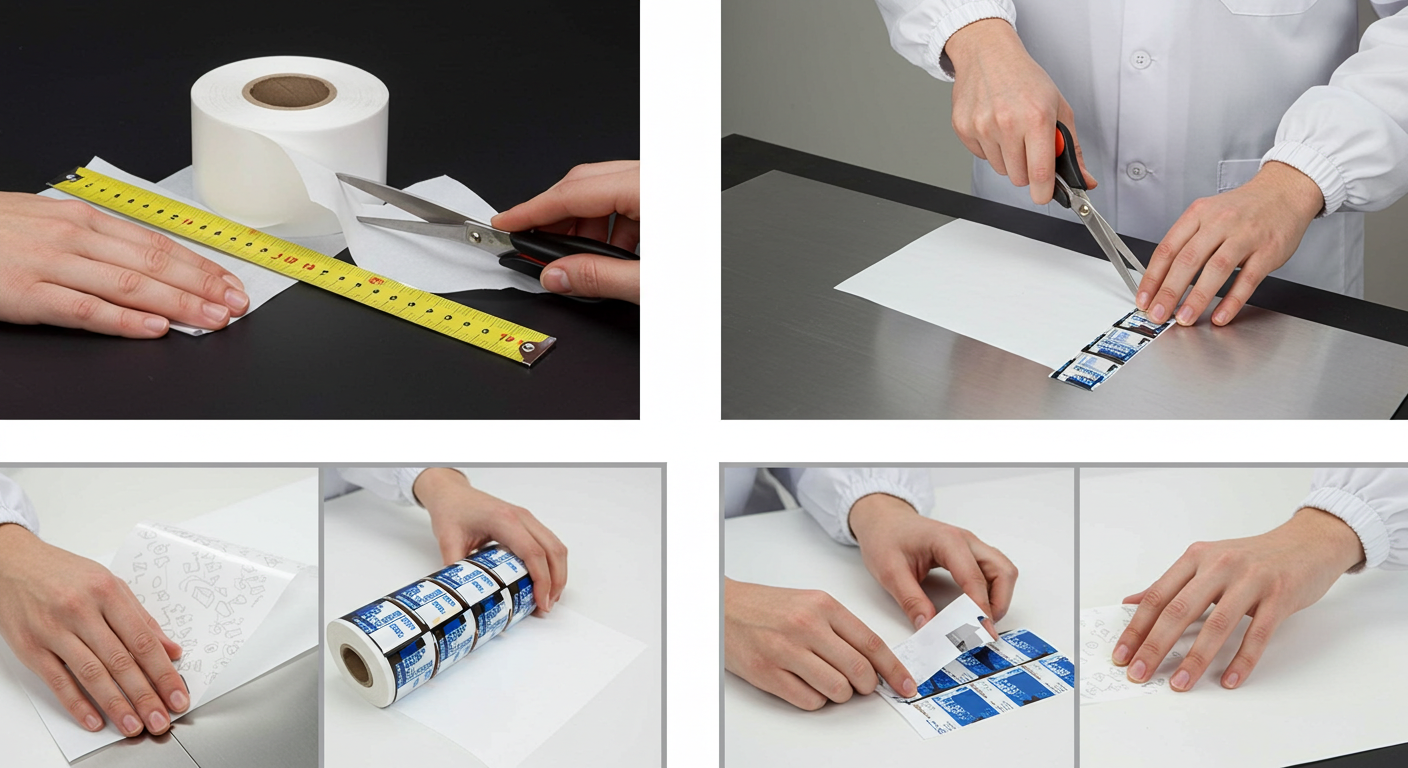
Cutting Sticky-Back Thermal Paper
Sticky-back thermal paper isn’t delicate, but precision helps avoid waste or misprints. Here’s how to cut it right:
1. Print Before Cutting
Always print before cutting, especially if you’re not using a perforated roll. This ensures your labels stay aligned and you’re not guessing where to cut.
2. Use Sharp Blades
Dull scissors or blades will tear or fray the paper edges—and that’s not a good look for professional labeling. Keep a sharp pair of scissors handy.
3. Cut on a Flat Surface
A smooth, clean surface gives you better control. If you’re slicing multiple labels at once, use a cutting mat with gridlines for consistency.
4. Leave the Backing On
Don't peel the paper before cutting. It makes handling messier and can gunk up your scissors. Only peel when you're ready to apply.
Applying Sticky-Back Thermal Paper
1. Clean the Surface First
Whether it’s a box, bin, or binder, wipe the surface clean. Dust, oil, or moisture will weaken the adhesive and reduce the label’s lifespan.
2. Peel Slowly from One Edge
Start peeling from a corner, slowly. Ripping it off fast can bend or fold the label—and that adhesive is not forgiving once it’s stuck.
3. Apply from Center Outward
Align the label carefully, press from the center, and then smooth it outward to avoid air bubbles. Use a plastic squeegee or a straight edge if needed.
4. Avoid Touching the Sticky Side
Oils from your fingers can mess with the adhesive. Handle by the edges or wear gloves if you're applying a lot of them.
Extra Pro Tips
-
Store properly: Keep your thermal paper rolls in a cool, dry place to avoid fading or curling.
-
Label it right: Print what you need, when you need it—don’t bulk-print and let labels sit out. They’ll lose adhesive quality if exposed too long.
-
Match with printer: Always check if your printer supports sticky-back thermal paper. At POSPaper, we’ve got options for all the popular brands.
Why Buy Sticky-Back Thermal Rolls from POSPaper?
We don’t just talk the talk; we stock the sticky stuff too. Our sticky-back thermal paper:
-
Comes in multiple sizes and grades
-
Is compatible with Zebra, Dymo, Brother, and Epson printers
-
Offers smooth printing and dependable adhesion
-
Ships fast when you need to restock mid-labeling frenzy
Ready to Stick It Right?
Explore our wide collection of sticky-back thermal paper rolls on POSPaper. High-quality labels, fair prices, fast delivery—you get the point.